
Posts

Showing posts from June, 2015

Stampbord, pan pastels and some stamping to create a box

Well this week flew by so quickly but it was a great week. The weather was gorgeous and we packed so many activities in but all the children had great fun. I suppose apologies must be sent to all the parents as I bet they had some very crabby, tired children yesterday ... but they wouldn't want it any other way. Myself, I'm shattered and after a warm bath to soak the aches, I just had to jump in to my own bed to "chill" and more importantly, enjoy the quiet! Before I forget, I must announce my postcard RAK giveaway from We Love to Create Challenge #12 and the lucky winner of my postcard and stampbord pieces is ...   Linda Simpson Please email me Linda with your snail mail address and I will get your goodies (I hope) in the post to you. Anyhow, it's inspiration week over We Love to Create Craft Challenges and I have been playing with my stampbord again to create a box with its own hinged lid. This was one of my samples for the recent stampbord show on

Frame It with Polka Doodles

Friday and that means one thing ... we're on our way home. I have no doubt that I will be tired by the time I reach home, exhausted from our packed itinerary and also from lack of sleep. I never really sleep properly when away from home as miss my own bed but combine that with listening out for foot steps in the night, my sleep becomes very light. Next week in school there will be lots of reminiscing but for the staff, it's the next big project .... end of year production! Now the theme this week over at Polka Doodles Challenges is "frame it" and I have cheated a little by doing the tiniest little frame ... the reason, I didn't want to take away from the elements I had used on my card. I have used elements and papers from the Rose Budd CD (or on a download if you prefer) to create my card. I aged the papers with purple pan pastel so that they matched the pansy flowers and the butterfly has also been coloured with pan pastels. As an added touch, I have

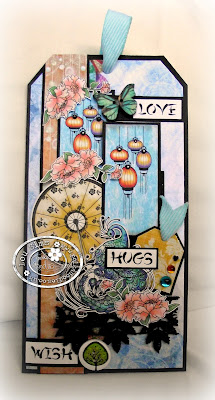
GDT for Digi Chooseday

Well it's day 2 on the school's residential trip and we are off to do some sea canoeing  and can't wait. The children are equally excited and we have our fingers crossed the weather will hold up. Unfortunately I can't join in as not sure my back/bottom muscles could cope wrestling to get in side a wet suit however will be on the shore line, cheering everyone on. Yesterday I shared how I used "Word" to merge images rather than a publishing package (photoshop, serif or MCS) and here is how I have used the images on my GDT project for Digi Chooseday  ... happy dance but doing carefully just in case I rehurt my back and bottom (hee, hee, hee)! The theme is "tag it" and here is my take on the challenge ... I decided to make a tag shaped card by cutting the corners off a DL card blank, which is a quick, cheats way to create the illusion of a tag. I have used the Dollie Daydream goes East collection and have to say, the papers in this collection are

Using Word to merge images ...

Although I do have several packages that make digi kits and merge images, I must admit for speed I often go to word. So I thought I'd share how I merge my images ... Now I appreciate that you make know some (or even all) but I have to work in a logical (ish) order ... First add your images using "insert picture" I have used images from Polka Doodles Dollie goes East collection. In order to move the images around your page, remember to either format the images or go to "wrap text". Just use "right click" on your mouse and the sub menu will appear. Next start placing your images in the order you wish to use them. Now, click on one of the images and the editing box appears ... Leave this edit box up and then move over to the next image but this time hold down the CTRL button and then click on the image (using mouse button) and a second editing box will appear. Repeat this process for the final image (or however many you have dec