Skip to main content
Search
Search This Blog
Louise Sims Papercrafter
Lou Sims: Papercraft Artist, Designer, and Blogger!
WORKSHOPS
Affiliate Disclosure
More…
Posts
Showing posts from May, 2015
Show All
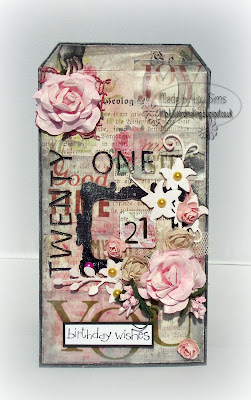
May 31, 2015
21 ..... no not me!
May 30, 2015
It's all about the journey ...
May 29, 2015
"aaarrrr treasure" ahoy ...
May 27, 2015
Labour of love ..... literally!
May 25, 2015
Enjoy each moment ...
May 17, 2015
Phew, got there in the end!
Newer Posts
Older Posts
Home