Rediscovered Delight: Layered Floral Cardmaking with Shady Designs Stamps
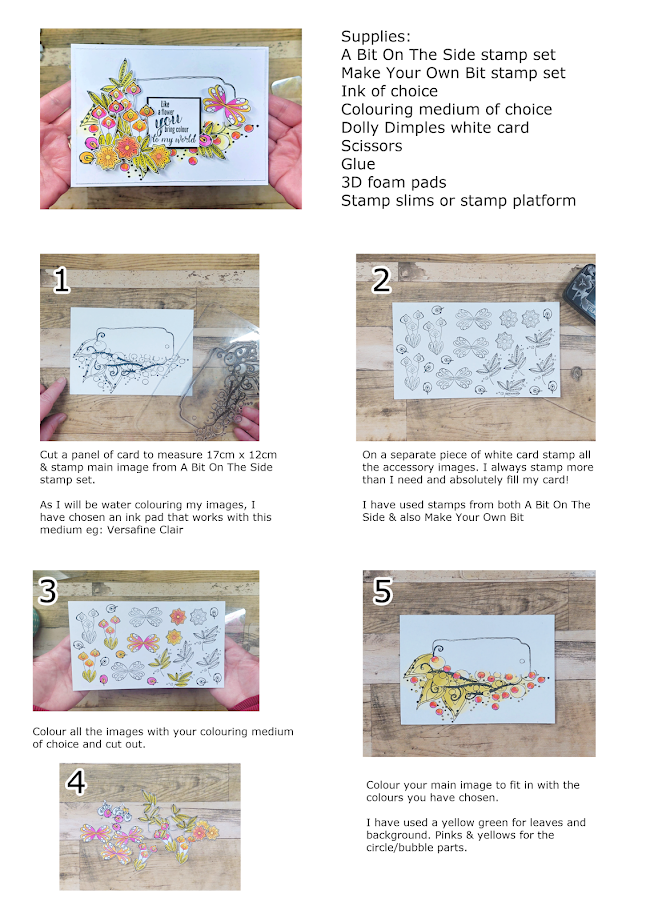
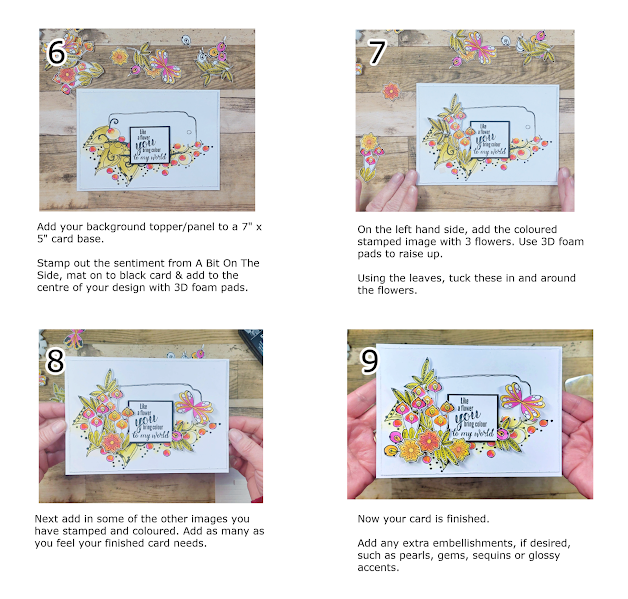
Discover how to create a vibrant, layered floral card while embracing white space. Using my own Shady Designs stamps, I’ll guide you through step-by-step coloring, stamping, and layering techniques for a beautiful handmade card.
Step-by-Step Layering & Colouring: downloadable instructions
Supplies Needed for Your Layered Floral Card
Shady Designs Make Your Own Bit stamp set
Sakura Koi Brush pens
Versafine Clair Nocturne ink
Acrylic stamp blocks or stamp platform
White cardstock
3D foam pads & glue
FAQ / Tips for Beginners
Q: How many layers should I use?
A: Stamp extra images and experiment — you can always trim or rearrange as needed.
Q: Can I use other colouring mediums?
A: Yes! Brush pens, watercolours, or coloured pencils all work beautifully.
Q: How can I make white space look intentional?
A: Leave clean areas, balance with colour, and avoid overcrowding.
Tips for Embracing White Space
-
Leave parts of the card base clean to let focal images pop.
-
Add subtle splatters or small accents rather than filling all space.
-
Layer thoughtfully: balance colours and textures for visual interest.
About Shady Designs
These stamps from my A Bit On The Side collection are perfect for creating layers, whether florals, geometric patterns, or your own visual rhythm. While they’re from my past designs, they’re still a valuable tool for creative projects.
- - - - - 💙 - - - - -
Revisiting Creative Freedom
This project reminded me how fun it is to play and embrace creative freedom. Letting go of perfection — filling all the space or doing things “the right way” — allows you to make cards with more joy and personality.
I hope this project inspires you to use what you already have, try a technique you usually avoid, or simply play.
Until next time, take care,


.png)
.png)
Comments