
What can I do with all those gel prints? Part 1 ... embossing powders with stencils + embossing folders
One of the questions I am asked if what do I do with all my gel prints after a creating session. Now this is a loaded question as there are so many ways to use them. With this in mind, I've created a few videos showing some of the ways I use mine. Here is Part 1 - using embossing powders.
Link to my video & all products used are towards the bottom of this post 👇
Where to begin?
I always begin by choosing gel prints that are not quite finished as need an extra "something". This also includes my saved mop up backgrounds too. Next grab a few backgrounds at random & get out your favourite crafty item. In my case, I adore embossing powders, as they were the main item that "hooked me" in to the world of craft.

Now grab some stencils or embossing folders, clear ink, heat tool & basic embossing powder colours.
TOP TIP choose things that spark your creativity eg: if you love the look of gold, grab a gold embossing powder. If you are into butterflies, grab a butterfly stencil or embossing folder. If you do this, you are half way there to creating beautiful backgrounds.
A list of all products used can be found at the bottom of this post.
What to do next?
What do I do with my gel prints? was something I was asked to cover on a recent Facebook Live - video links below. I began by sharing ideas with embossing powders. Using a clear ink begin by adding this through a stencil, remove, add your embossing powder & heat set. Do not waste the clear ink on your stencil but place this on to another background and run through your die cutting machine. Add embossing powder and heat set. You can see how I do this in my video.


If you love stamping, why not stamp a selection of images on to different backgrounds, add embossing powder & heat set. Now you have quick, effective coloured stamped images. Doing this trick adds that's originality to your project because no two backgrounds are the same.
Okay ... but I now have embossed gel prints!
Very true! However, these prints now have a newer look and for me, are easy then to use in my crafting. The embossed gel prints I created in my Facebook live, sparked me to create SEVEN HANDMADE CARDS!
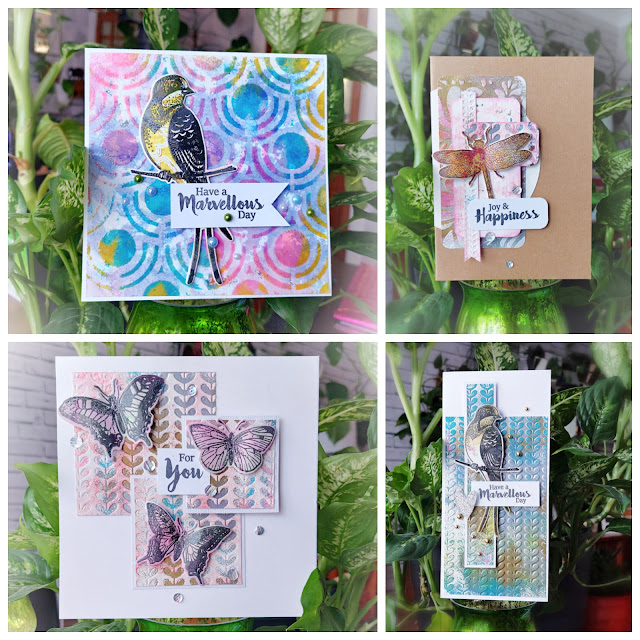
Card 1:
I have simply cut up the background, added to a white DL card blank. With the off cut, I added this to a white matt layer & added to my card with 3D foam pads. The bird image has been stamped and heat embossed on to another background. It was also added along with a sentiment & a few embellishments.

Card 2:
I cut down the background to fit a white 7" x 5" card base adding it to kraft card first. Next I added a layered butterfly stamped image. These were stamped on to another background & cut out. Again a sentiment added & a few embellishments.

Card 3:
For this card, I cut the background to fit a 5.5" x 5.5" white card base. I adore the movement & colour in this background & did not want to hide any of it. Another stamped & embossed image was added - created as before - simple sentiment & a few gems. Instead of traditional embossing powders, I went for Ranger Tim Holtz Distress Glazes instead.

Card 4:
This card has been made using the debossed background. I cut the background in to squares, layered them on to a white 6" x 6" card base. Next I added 3 stamped & embossed butterfly images, a simple sentiment & a few sequins.

Card 5:
This card has been made using some of the background offcuts. I shaped them in to banners and stuck to a piece of kraft card with twine. This was then added to an A6 white card base. I've added a stamped & embossed butterfly. Added embellishments were my sentiment, floral die cuts & a few gems.

Card 6:
This card is again using the background offcuts & layered on top of each other. Layers have been raised using 3D foam pads. I've added a stamped & embossed dragonfly image this time. A simple sentiment & a few sequins were my finishing touches.

Card 7:

YouTube videos
I have uploaded my Facebook Live, in full, to my YouTube channel. You can then see my step by step process for all the different heat embossed backgrounds I created.
I have also created a condensed video, removing the chat, slightly sped up & just showing the process.
What next?
I am in the process of both editing & creating additional videos to show lots of different ways to use your gel prints. I am hoping in each video to cover different crafting styles from card making, mixed media, die cutting, collage art journal pages & memory albums. As you can see, there really is so much you can do.
In the meantime, I am sharing links to other videos and blog posts I have created showing different ideas to use with your gel prints.
Blog posts:
Quick cards using left over backgrounds
Art journal pages with Bee Crafty & Gelli Arts
Mixed media cards with Polkadoodles
GelliArts Perfect Placement Tool
Beginners step by step tutorial - printing with oxide inks
YouTube videos:
If you pop over to my YouTube channel - Lou Sims, Papercrafter - and under the playlist "Gel Printing Ideas & Techniques" you will discover a whole host of my videos either making/creating gel prints or using them in different ways.
Where can you find me?
YouTube - Lou Sims, Papercrafter
Pinterest - Lou Sims, Papercrafter
Facebook - craft page
Facebook - personal page
THANK YOU so much if you have made it to the very bottom of this post. A list of all my supplies used are below.
Hope to see you again really soon,
Lou
xxx
SUPPLIES
If you want to find out about the products I have used, click on the shop link(s)/icon below.
Affiliate links are used at no cost to you & my full Affiliate disclosure can be found here.
Thank you so much for your continued support.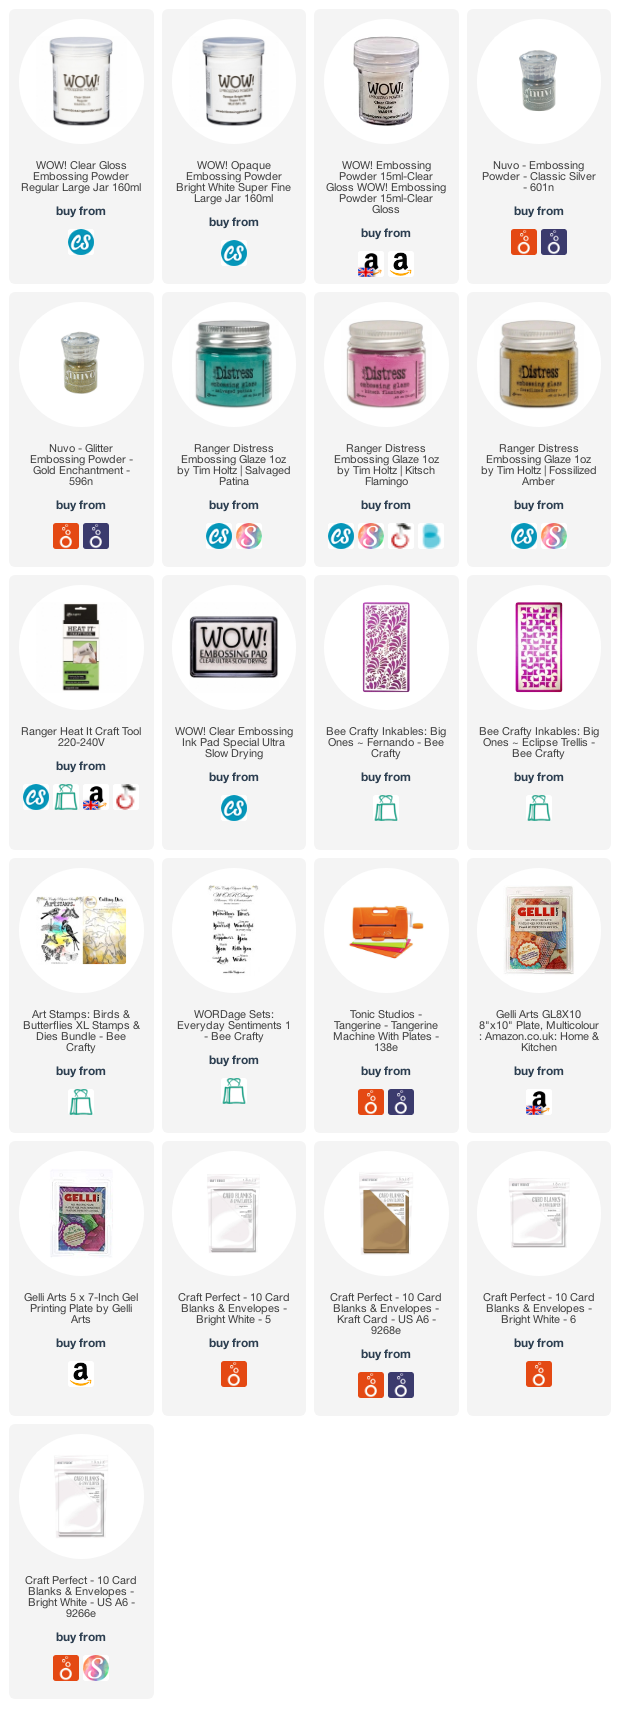
Comments
Gr Karin